My friend Nancy (she’s an artist, check out her stuffs y’all!) sent me a link to a post about omelets in a bag recently. I can’t believe I had never heard of them before!
Each weekend that I have a day off from events, I try to plan a hands on breakfast that I can make with my kids. We love omelets, but it’s hard to make 8 of them at once and still manage to eat all together. I always have two pans going, but even so, by the time I finish cooking, the first two batches have already been gobbled up. This method allows the kids to customize their own breakfast, and everything can be cooked all at once. (For another delicious breakfast recipe that’s easy to make with the kids, check out my Biscuit Breakfast Bake post!)
 Omelets in a bag
Directions:
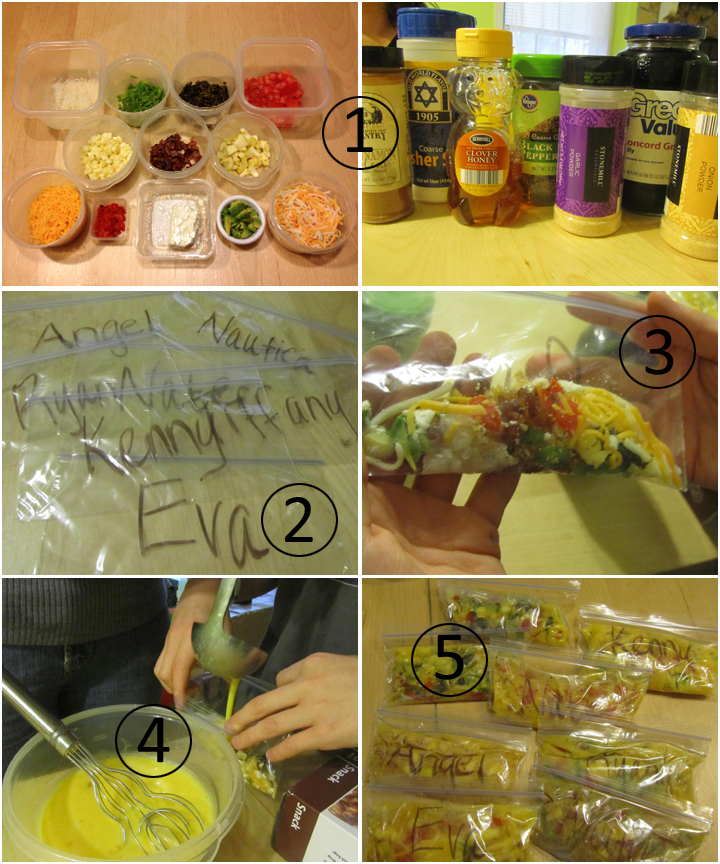
1. Set out your ingredients.
2. Write everyone’s name on a bag (permanent marker).
3. Let everyone pick out their own ingredients.
4. Add a ladle of egg to each bag.
5. Double check everyone’s bags to make sure they are sealed all the way. (watery eggs, yuck!)
This time, I chopped up a wide variety of ingredients. The kids were able to choose from peppers, onions, olives, tomatoes, peppers, cheese, apples, bacon, and more. For seasonings, I set out cinnamon, honey, garlic powder, onion powder, jelly, pepper, and salt. Cracking eggs can get a little messy with kids, so I did that part for them before portioning the eggs into the bags.
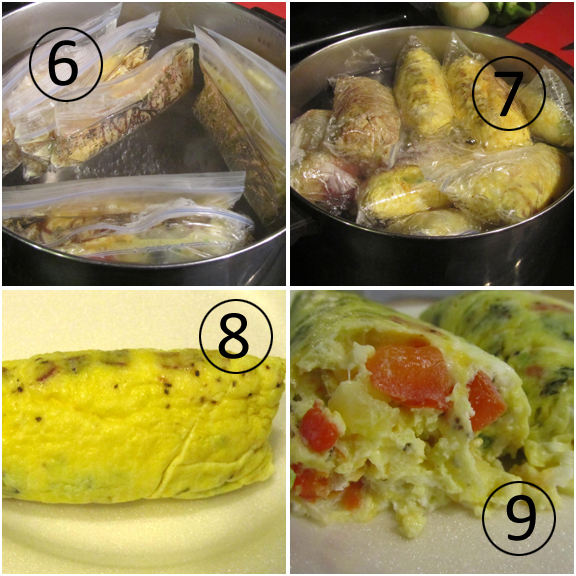
6. Put the bags into a large pot of water. Bring to a boil.
7. Cook for about 10 minutes, you’ll be able to see when the eggs are finished cooking.
8. Open the bags and remove the omelets. They should just slide right out. (No grease, oil, or butter needed!)
9. Enjoy!
Not only is this a quick way to prepare omelets, but it takes the caked-on egg skillets out of the equation! My kids loved that they could choose exactly what they wanted in their omelets. Allowing children to make their own choices about small things helps to build their confidence, and teaches them about independence. Plus, it’s a lesson in consequences as well. If they refuse to listen to mom and instead put in 6 Tbs of jelly and 2 Tbs of salt into their eggs, they’ll learn really quick that maybe they should have paid attention, and you won’t even have to nag!
I may be busy a lot of the time with business, but weekend breakfast with my kids is a moment I treasure. We get a chance to talk about school, friends, their activities, and more. It’s such a great way to start the day! And now with this easy bagged method, we can all eat at the same time on omelet day!
(BTW, if you are a camper, this is an excellent way to cook eggs at a campsite!)
Want to make this meal even easier? Check out some of my favorite time saving kitchen tools below!
1. Double balloon whisk – Mine is from when I was a Pampered Chef consultant, but any brand will do. They work so much better than a traditional whisk, and really beat things up pretty quickly. Twice the wires means half the work time! (Be sure to use the end of the whisk to “pop” the yolks first, they’ll mix up much faster that way.)
2. Food chopper – Another thing I had from Pampered Chef days, a food chopper really saves times on chopping up ingredients, and you can get the exact type of chop you desire, from rough to extremely fine.
3. Mini ladles – My favorite is the one ounce size. We have a variety of ladles, but this one is the most versatile. Works great for ladling eggs in this case, but it’s also perfect for gravy, dessert sauces, and more. Using those huge soup ladles just doesn’t cut it sometimes!
*This post includes affiliate links, and I earn a small commission from any items purchased. Maybe even enough to take my kids out for ice cream. Or buy myself a cheap bottle of wine!*
Have you ever tried to cook eggs in a bag? What’s your favorite way to eat your omelet? Share your favorite recipe in the comments below!


Comments
Post a Comment
Got something to say? Please gently speak your mind. AFM loves hearing from readers. :o)